
Filters Are a Game Changer
Posted by Andy Crawford on Sep 22nd 2022

Posted by Andy Crawford on Sep 22nd 2022
I’m often asked why I use filters in my photography. After all, today’s digital world allows much of the flexibility of filters without carrying extra gear into the field. And, honestly, that’s the way I used to work. The problem was that there is a lot of finger-crossing when taking different exposures and stacking them for a final image in post-processing.
That’s exactly why I love using filters, just as the old film masters once did. I can envision what I want the photo to look like and use filters to create that final image — in camera. No guessing. No hoping it all works out. I KNOW what my final image looks like BEFORE I pull the file into my computer. That saves me time in post-processing and frustration when stacked images just don’t work out.
So how exactly do I use my Benro filters? Glad you asked.
First, a polarizer is always on the front of my camera. My recommendation is to look for quality filter system that include an integrated polarizer, such as the Benro holders do. I’ve used systems in which the polarizer took up a holder slot, and they just don’t allow the flexibility of an integrated system.
The most recognizable use for drop-in comes during sunsets and sunrises, those times when there is massive contrast between the sky and foreground. This is when filters really shine.

My go-to kit is the Benro Master Glass 100mm set of filters, which I pair with a Nikon 24-120mm f/4 lens. That lens is my meat-and-potato tool for creating breathtaking prints, and it’s responsible for probably 90% of images in my online gallery. Combined with my filters, and my gallery is filled with gorgeous landscape photos.
The most-important filters in the kit are my soft-grad neutral densities, which allow me to darken the sky without darkening the foreground. I keep three soft-grad filters in my bag at all times: a .6 (2 stops), a .9 (3 stops) and a 1.5 (5 stops). These three filters allow me incredible flexibility when creating balanced in-camera images.
The .9 is the soft grad I use the most. However, there are times when I will stack more than one of the soft grads to darken the sky, often feathering in the .6 when a test shot shows highlights are still blowing out.
The trick is to remember the filter will darken trees and other elements that extend above the horizon. For instance, I am constantly photographing cypress trees in the swamps. So my soft grads will darken the trees as I push the filters down to the horizon. So I simply make choices about what I want. Sometimes I decide to create a print with the cypress tree in silhouette, a very effective and impactful choice. However, I also know my Nikon D850 has 14 stops of dynamic range, so I usually can pull out just enough detail in the tree, even if the filter is impacting it. I just have to watch for haloing in the outer leaves.


But I also will use soft grads when working with waterfalls (and I LOVE photographing waterfalls). Often the sky is much brighter than the chasm of the waterfall, so I’ll slip in a soft grad to even out the exposure and prevent overexposure in that portion of the photo. One cool tip for shooting waterfalls (one of my favorite subjects) is to use a .6 soft grad to pull back the exposure on the top of the cascade if there are highlights there that give you trouble. Often that is the brightest part of a waterfall, and I find I can easily have overexposed areas there. So I slip a .6 soft grad into my holder, pushing it down so the graduated portion of the filter just tips the waterfall’s upper section. That usually resolves the problem — and I can pull up any foliage that gets darkened during post-processing.


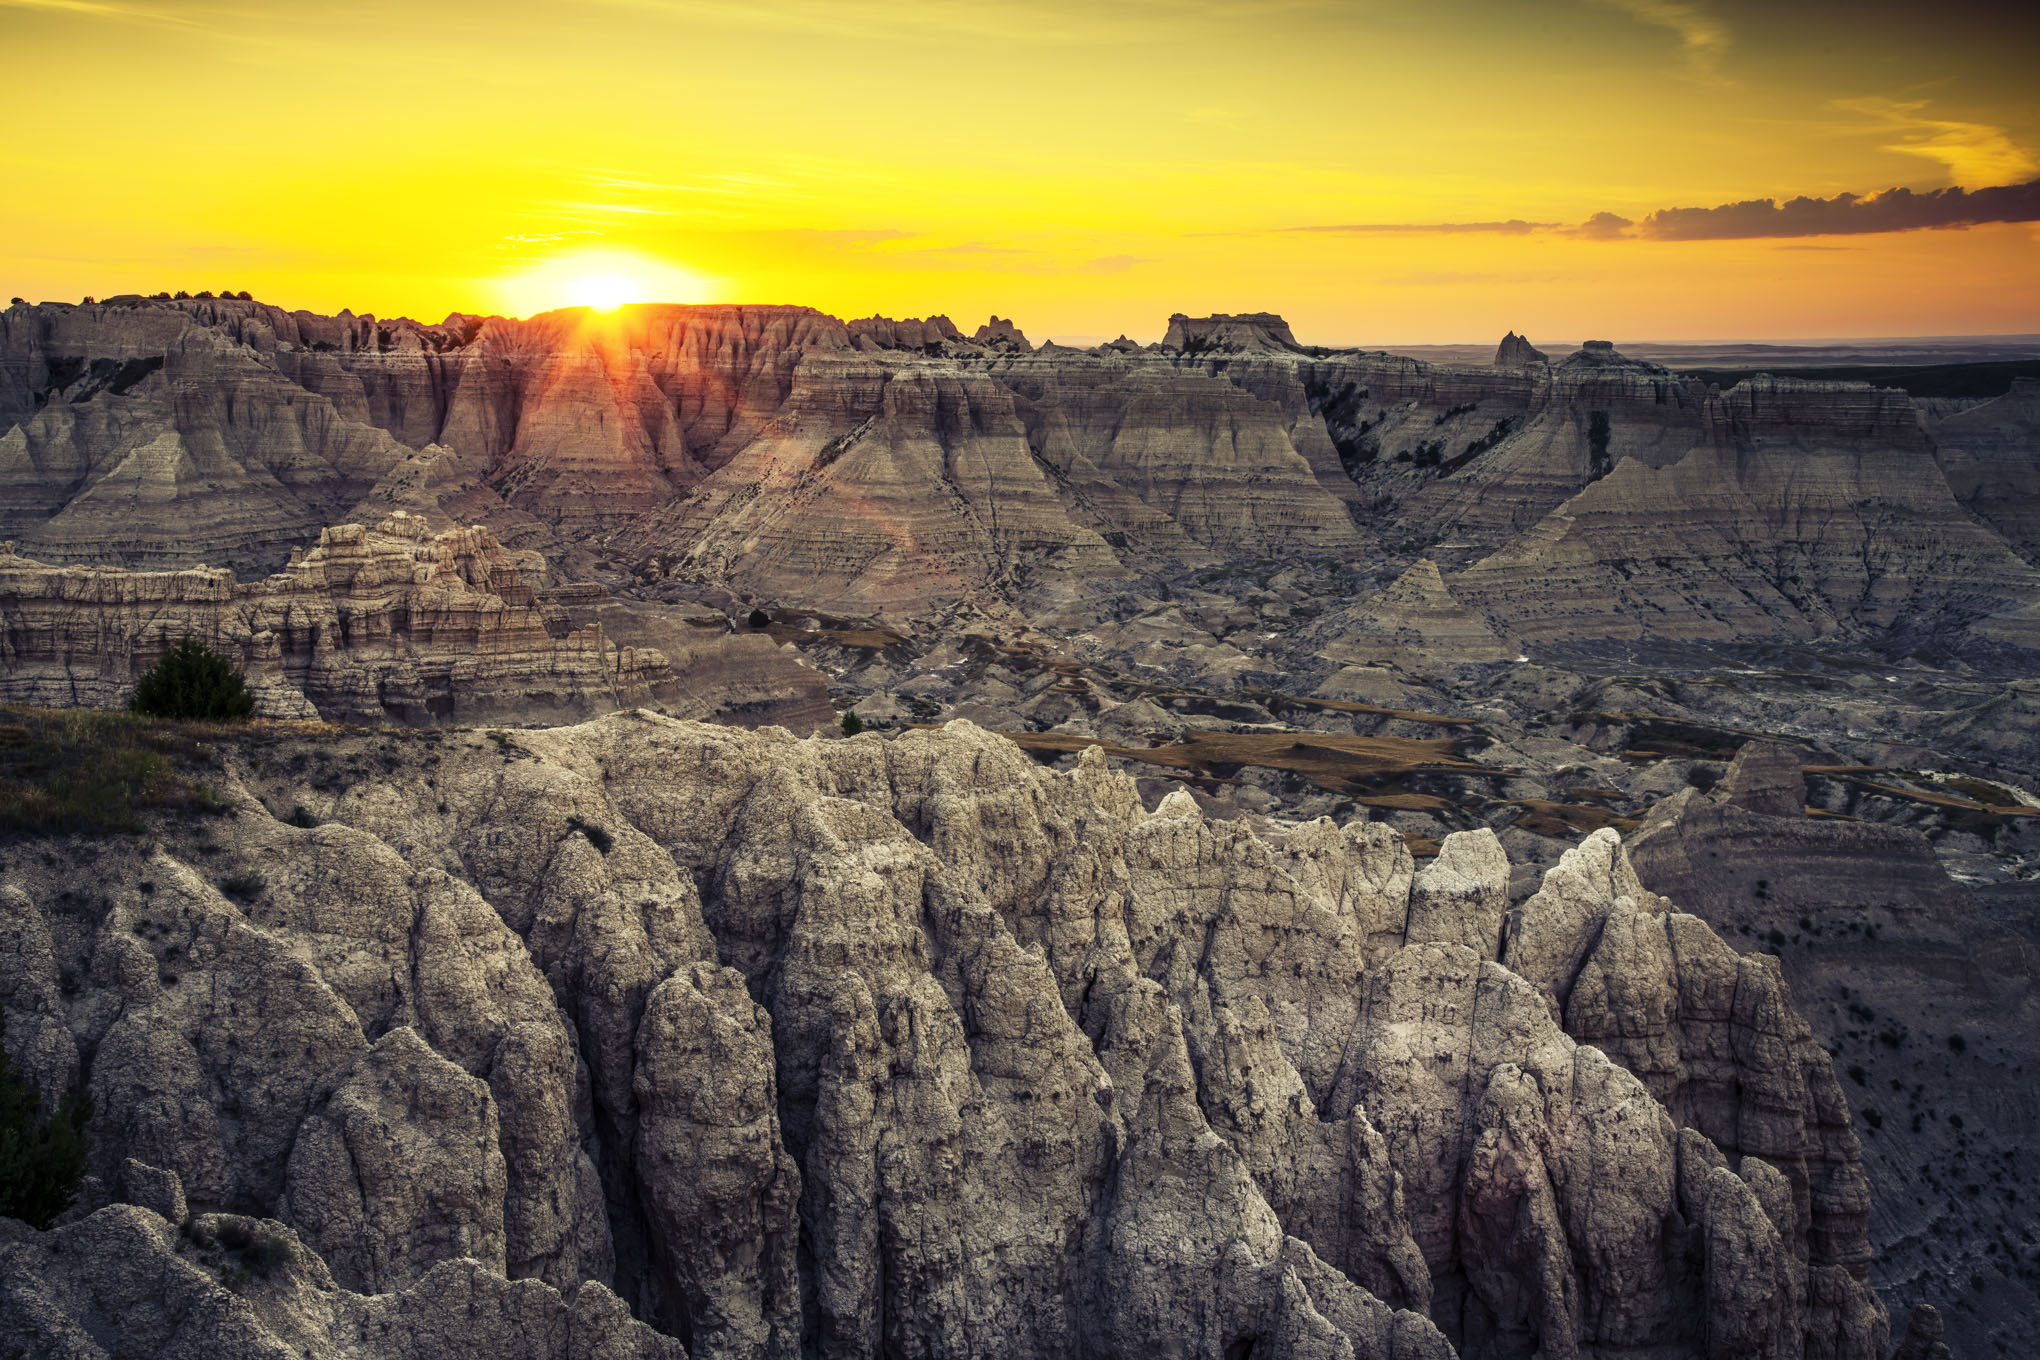
I also keep a .9 reverse grad in my kit, which is wonderful when the horizon is unbroken by trees or buildings. For instance, I used this filter when working in Theodore Roosevelt and Badlands national parks, since the horizon in those landscapes is fairly flat and clean; I didn’t have to worry about the filter darkening any trees. The beauty of this filter is that, when you can use it, the brightest part of the sky (the horizon) is darkened while the upper part of the photo’s frame is allowed to remain lighter. It provides a wonderful, natural finish to the sky.
Now comes the really fun part: solid neutral density filters. These have so many uses in the field. The easy explanation is that these solid NDs cut the amount of light reaching your sensor, resulting in longer exposure times. My 100mm kit includes three filters: a 1.2 (4 stops), a 1.8 (6 stops) and a 3.0 (10 stops).
Obviously, these are most useful when there is no wind. But when you can use them they result in incredible images.
My main use is when shooting scenes with water, be it a swamp, a waterfall or a beach. Again, I envision the final image and use these filters to translate that vision to the camera. Take a waterfall, for instance. My style includes creamy smooth water as it cascades into the pool below and rushes through the rocks on its journey out of the frame. So I first compose the scene and then ensure the polarizer is adjusted to remove or diminish the glare on the water. Then I will dial in my exposure and take a test shot, ensuring I don’t need to add a soft grad to darken the top of the falls or the sky.

Once that is accomplished, I pull out my iPhone and open up a long-exposure calculator (I use ExpoCalc), inputing the current exposure and then turning on ND filters sliders to see which will lengthen the exposure sufficiently to allow the movement of the water to be captured as silky smooth lines through the frame.

Here’s a real-world example: Say my base exposure is 1/30 of a second at f/10, with an ISO of 64. The corresponding exposure time with my solid NDs would be 1/2 second with the 1.2 filter; 2 seconds with the 1.8 filter; and 32 seconds with the 3.0 filter.
I would probably go with the 1.8 filter and let my sensor soak for 2 seconds. I’m usually looking for an exposure of at least 1 second, but will adjust that after seeing the results on my LCD.
A note about wind: Waterfalls often create wind, even on dead-calm days. That means I have to keep in mind movement in the foliage around the cascade. This is where I will stack images, taking one shot for the water and then one frame at a faster shutter speed to freeze the movement of the foliage. In post I simply stack the images in Photoshop and paint in the foliage around the waterfall.

Another great use of solid ND filters is to create movement in clouds. The same approach applies to this work as to waterfalls, but I find the exposure times need to be at least 2 minutes to create the most dramatic effect. That sometimes means compositing images in post to remove any movement of foliage, but that’s so easy today.
The bottomline is that filters are as important today as they were in the film days. They allow incredible flexibility and creativity, and take all the guesswork out of creating the image you visualize.
I never go into the field without my Benro kit.
See more of Andy’s work: https://shop.andycrawford.photography/